


If you’ve ever grabbed your bangs at 11 p.m. and thought, “I can fix this,” you’re my people. I learned how to use thinning shears on short hair the hard way—by snipping a little too close to my crown and creating a frizzy halo I did not order. Since then, I’ve practiced the right way to remove bulk, soften lines, and keep a cropped cut light and swingy. Here’s the clean, pro-informed method I trust (and you can, too).
What do thinning shears actually do—and how are they different from texturizing shears?
Thinning shears reduce bulk and blend harsh lines by cutting only part of each hair strand with a fine-tooth blade; they typically remove a modest percentage of hair per pass and are best for refinement, not for building the haircut’s shape. Texturizing shears, by contrast, have fewer, wider teeth and remove heavier chunks for visible separation and bolder texture. Use thinners to smooth and blend; use texturizers to open up movement and create piecey definition.
A quick spec check helps you shop smart: many thinning shears carry around 28–40 fine teeth (often ~30–40), which correlates with lighter, subtler removal compared to texturizers (commonly ~12–16 wider notches).
How to use thinning shears on short hair: what’s the safe, step-by-step?
Start with dry or almost-dry hair so you can see the real bulk and fall.
- Section with intention. Create clean, small sections—especially on short hair—so removal stays even and you don’t carve visible lines. Sloppy or thick sections lead to patchiness.
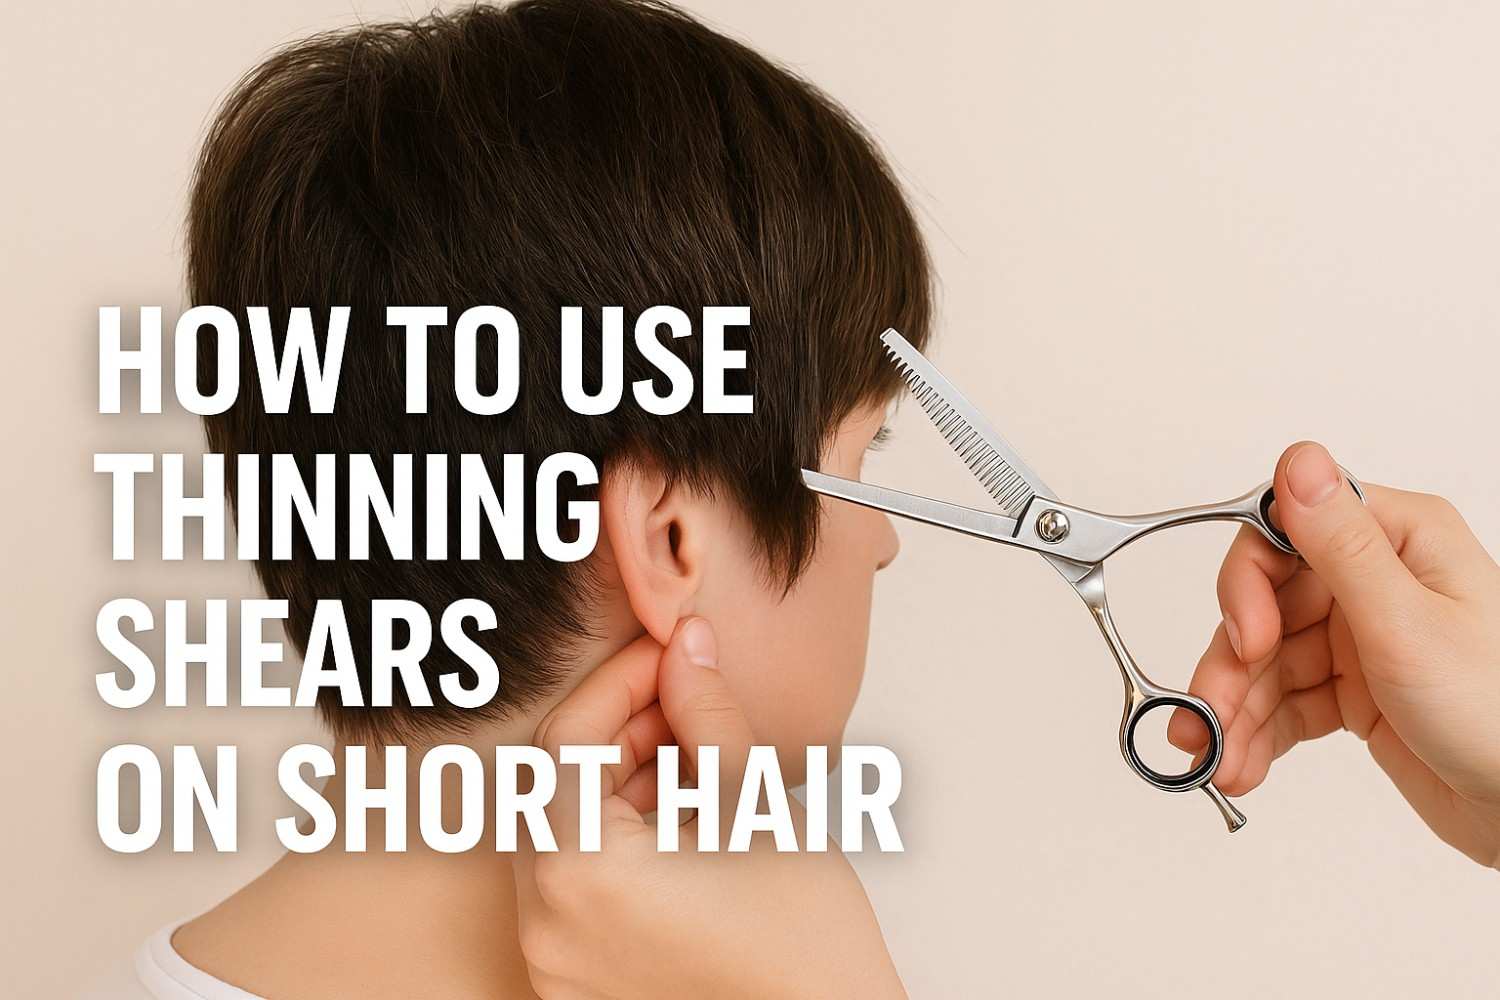
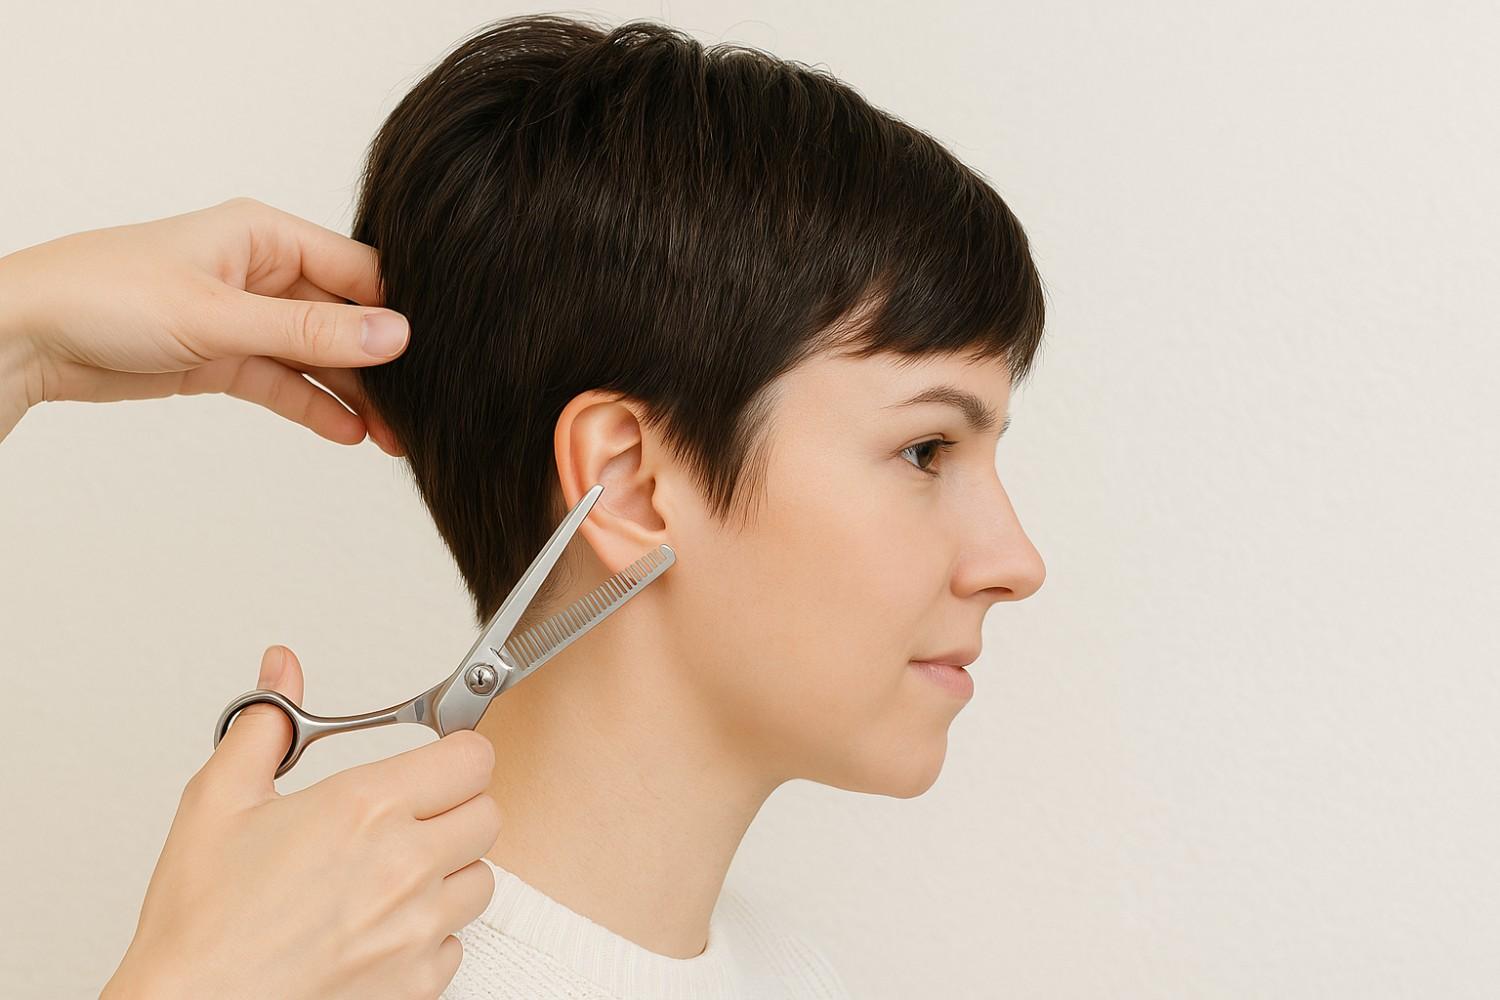
- Mind your placement. Work from mid-shaft to ends first. Avoid the first ½–1 inch at the scalp on very short areas; cutting too close can cause stubbly bits that stick up (hello, cowlick chaos). Thinning shears are best for the final 10% of a cut to “polish,” not to create the shape from scratch.
- Use light, moving snips. Hold a small section between your fingers or comb, place the shear perpendicular to the hair, and open-close as you slide out through the section. Take tiny bites, check, then repeat. This moving snip blends without leaving hard steps.
- Blend the transition zones. On crops, bulky spots usually live at the parietal ridge (sides round into top), behind the ears, and in the occipital “ledge.” Skim these with two to three soft passes, comb down, reassess, and stop as soon as the hair collapses the way you want.
- Detail the fringe last. For bangs or short face-framing, start below the midpoint of the strand and work downward so the edge stays soft instead of stringy. Keep the teeth facing with the fall of the hair to avoid random “holes.”
Where should you thin short hair to remove weight (and where should you avoid)?
Target bulkiest areas: On pixies and lobs with dense sides, enter midway through the strands and taper toward ends. In crown zones, take micro-sections; over-thinning here can make the top collapse or spike.
Avoid danger zones: Skip the first few millimeters at the root on very short sections, skip obvious cowlicks, and be cautious along hairlines—short, freshly thinned hairs can spring up and refuse to lay flat. Keep most passes from mid-lengths to ends.
Use the right tool for the goal: If you want airy separation or a choppy finish, reach for a true texturizer (fewer, wider teeth). If you just need to blur a step or de-bulky a dense area, use thinning shears.
What mistakes cause holes, frizz, or “chewed” ends?
Thick, uneven sections. If you thin random handfuls, you’ll get uneven texture and visible tracks. Keep sections narrow and consistent.
Cutting too high or against growth. Thinning near the scalp or with the teeth facing against the direction of fall can leave obvious notches that stick out. Angle with the growth and start lower.
Using thinners to do the whole haircut. They’re a finishing tool—use them sparingly at the end to decorate the shape you already cut. Overuse can weaken ends and make short hair wispy instead of polished.
Which thinning shears should you buy for short hair?
For most short-hair blending, a classic 28–40-tooth thinning shear offers controlled, subtle removal—great for softening and weight reduction without obvious gaps. If you want a chunkier texture, consider a separate texturizing shear with wider notches (often around 12–16). Keep in mind that higher tooth counts remove less per cut; fewer/wider teeth remove more.
Also, maintain the basics: keep shears sharp, clean, and aligned. Dull thinners “chew” ends and create fuzz you’ll end up chasing with more cuts.
Can I combine thinning with point-cutting or slide-cutting?
Yes—many pros refine with thinning shears and classic scissor techniques. Point-cutting parallel to the hair removes weight without big notches; thinning afterward can blur any remaining steps for a seamless finish on short crops. Use both lightly and reassess often.
Frequently Asked Questions
1. Is it safe to use thinning shears at home on a pixie?
It can be, if you go slow and treat the tool like a finisher. Work in tiny sections, start mid-shaft to ends, and make two or three gentle passes max before you reassess. Don’t try to create the cut with thinners—shape first, then refine. Over-thinning, especially near the scalp, is what causes the “holes” and fluffy patches.
2. How many teeth should my thinning shears have for short hair?
A versatile range is around 28–40 teeth. More teeth = finer, subtler removal for blending; fewer/wider teeth (on texturizers) = chunkier removal and visible separation. If you’re new, start with a higher-tooth thinning shear for safer, more forgiving passes.
3. Where should I thin if my sides feel puffy?
Target the mid-lengths of the side panels and the transition into the top (parietal ridge). Keep sections small and consistent, make two light passes, then comb and check. Avoid the first half-inch at the root so short cut hairs don’t stick up.
4. Why does my hair look frayed after thinning?
Likely dull blades, thick sections, or cutting too high. Sharpen your tools, thin in narrow sections, and keep the movement with the hair’s fall. Finish with a tiny dusting of ends if needed, rather than more thinning passes.
Sass, but make it blended: my no-panic finish
Here’s my golden rule for how to use thinning shears on short hair: thin less than you think, lower than you think, and only after you’ve shaped the cut. Start mid-shaft, take micro-sections, and use two light, sliding passes before you stop and check. If the hair suddenly collapses and swings the way you wanted—hands off the shears. You can always take more, but you can’t un-thin.